
Video has turned out to be the coronary heart and soul of online training. Whether you’re an instructor, educator, or difficulty-remembering expert, understanding a way to document and edit video instructions is important for growing content that educates, engages, and converts.
But permit’s be honest—there’s loads more to it than simply hitting “file.” From picking the proper equipment to editing like a seasoned pro, this guide walks you through the complete procedure in a pleasant, no-fluff manner. Ready to stage up your e-gaining knowledge of sport? Let’s dive in.
Planning Your Video Lessons
Define Your Learning Objectives
Before hitting that purple button, ask yourself: What do I want my students to study with the aid of the stop of this lesson? Be clean and particular. Strong goals give your lesson shape and purpose.
Know Your Audience
Are your beginners beginners or advanced? Teenagers or running specialists? Tailor your tone, examples, and visuals to their degree and pursuits.
Create a Script and Storyboard
Don’t wing it—outline your content scene by scene. A script facilitates you to live concisely and confidently. A storyboard maps out visuals and transitions, which is fantastically beneficial when editing.
Scriptwriting Tips
- Use conversational language
- Keep sentences brief and punchy
- Add pauses for effect
- Practice studying aloud for float
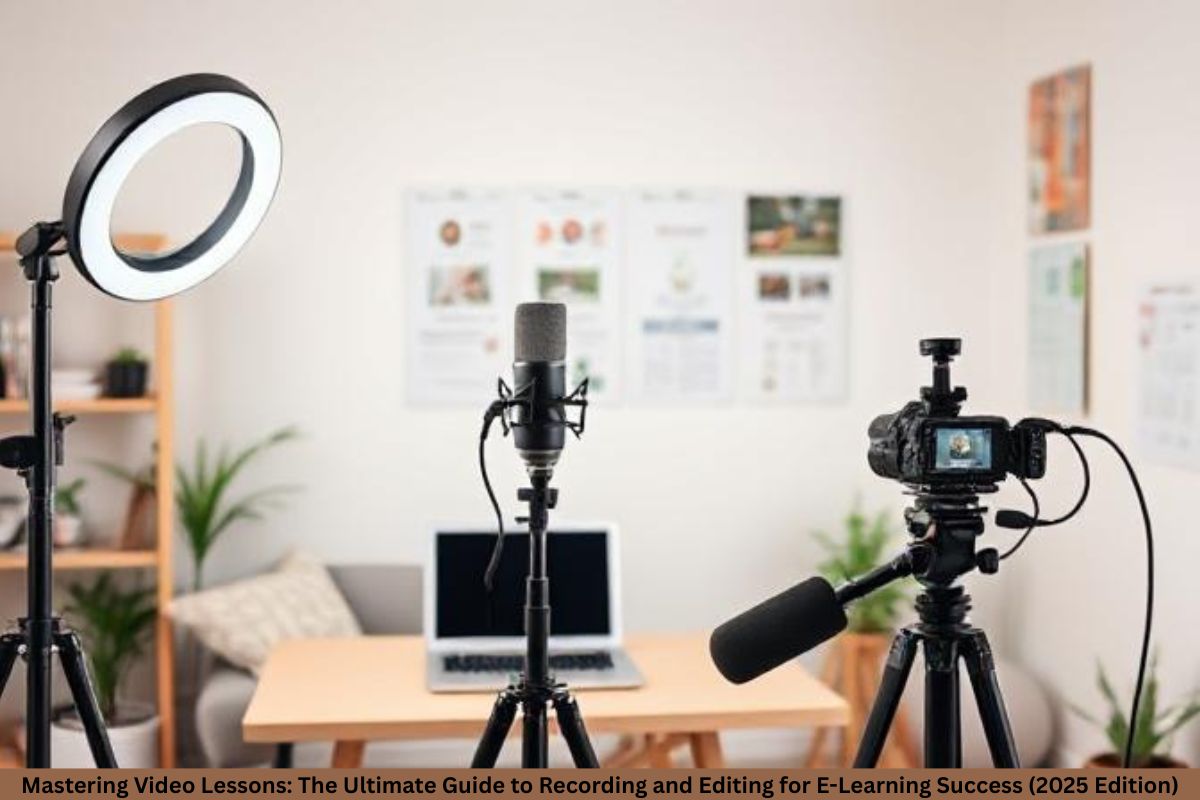
Essential Equipment for Recording
Camera Options
You don’t need a Hollywood setup. Smartphones work first-rate if used properly. Want better first-rate? Try webcams or DSLRs with clean HDMI output.
Microphones
Sound is everything. A crackly mic can spoil an incredible video. Go for:
- Lavalier mics (clip-on)
- USB condenser mics (for computer systems)
- Shotgun mics (for DSLRs)
Lighting Setups
Good lighting fixtures instantly boost video great. Use:
- Ring lighting for direct face lighting fixtures
- Softboxes for balanced mild
- Natural mild, if possible—simply avoid harsh shadows
Screen Recording Tools
Teaching via slides or demos? Tools like OBS Studio, Loom, Camtasia, and ScreenFlow (Mac) permit you to record your screen with voiceover.
Setting Up Your Recording Environment
Choose a Quiet Space
Background noise is your enemy. Pick a quiet room and turn off fanatics, A/Cs, or ticking clocks.
Background and Framing Tips
A plain wall, bookshelf, or branded backdrop works nicely. Frame yourself at eye level with a few headroom. Avoid atypical angles.
Avoid Distractions
Put your cellphone on silent. Inform others that you are recording. Use a “Do Not Disturb” sign if wished.
Recording Your Lessons
On-Camera vs. Voice-Over
Both are legitimate. On-camera adds character, at the same time as voice-over works for slides or display screen shares.
Tips for Confident Delivery
- Smile and talk certainly
- Maintain eye contact with the camera
- Rehearse, but don’t memorize
- Use hand gestures; however, don’t overdo it
Using Visual Aids Effectively
Use slides, infographics, or animations to enhance key points. Don’t overload visuals—maintain them clean and targeted.
Screen Recording Best Practices
- Record in 1080p
- Close useless tabs
- Zoom in on key regions
- Highlight mouse clicks or use annotations
Editing Your Video Content
Choosing the Right Editing Software
Popular alternatives:
- Free: iMovie, DaVinci Resolve, Shotcut
- Paid: Camtasia, Adobe Premiere Pro, Final Cut Pro
Basic Editing Steps
- Trim awkward pauses and errors
- Add transitions between sections
- . Insert titles and decrease-thirds
- Use zoom-ins or highlights for emphasis
Adding Annotations and Effects
Overlay text for clarity. Use arrows, highlights, and animations sparingly—they have to decorate, no longer distract.
Syncing Audio and Video
If you recorded audio one by one, sync it via clapping as soon as on camera—that’s your marker!
Exporting and Formatting Your Video
Best Formats for E-learning
MP4 (H.264 codec) is extensively supported and balances high-quality with record size. Aim for 1080p resolution.
Compression Tips
Use equipment like HandBrake to compress without major loss. Great for faster upload and smoother playback.
Subtitles and Closed Captions
Boost accessibility and retention. You can automobile-generate with YouTube or use equipment like Veed.Io, Kapwing, or Rev.
Uploading to E-Learning Platforms
Top Platforms to Use
- Teachable
- Thinkific
- Udemy
- Kajabi
- Skillshare
Optimize Your Upload
Add:
- A catchy identity
- Descriptive tags
- An engaging thumbnail
- A compelling path description
Video search engine marketing Tips
Use key phrases in your name, tags, and transcript. Add timestamps for longer motion pictures.
Tips to Improve Video Engagement
Keep It Short and Sweet
Break down your training into bite-sized motion pictures (5–10 minutes each). Learners love chunked content.
Add Quizzes and Call-to-Actions
Pause to ask questions or advocate for responsibilities. It keeps college students wondering and interacting.
Encourage Feedback
Ask visitors to remark or message you. Use feedback to improve your content material and build a community.
Tools & Resources for Video Creation
Software You’ll Love
- OBS Studio (loose display screen recorder)
- Camtasia (display + video modifying)
- Audacity (audio enhancing)
Stock Libraries
- Pexels, Pixabay (loose inventory footage)
- Artlist, Epidemic Sound (song & SFX)
Templates
- Canva for slide and thumbnail templates
- Motion Array for video templates
Conclusion
Creating exceptional video instructions isn’t rocket technology—you just need the proper plan, equipment, and mindset. Whether you’re coaching algebra or anatomy, video helps you connect, inspire, and educate effectively.
So move ahead—write that script, mild up your space, and press file. Your students are ready.
FAQs
What’s the pleasant software program to edit e-mastering motion pictures?
For novices, Camtasia is tremendously intuitive. More advanced users may pick Adobe Premiere Pro or Final Cut Pro.
How long does my video training need to be?
Aim for 5–10 minutes, consistent with the video. Shorter segments are easier to digest and hold attention.
Do I need a green display?
Not at all. But if you need to update your heritage, an inexperienced display can assist—it’s optional.
Can I use just my smartphone?
Absolutely! With respectable lighting fixtures and a tripod, present-day smartphones shoot tremendous video.
How do I make my films extra enticing?
Use visuals, inform memories, ask questions, and hold your tone upbeat. Make studying a laugh!